
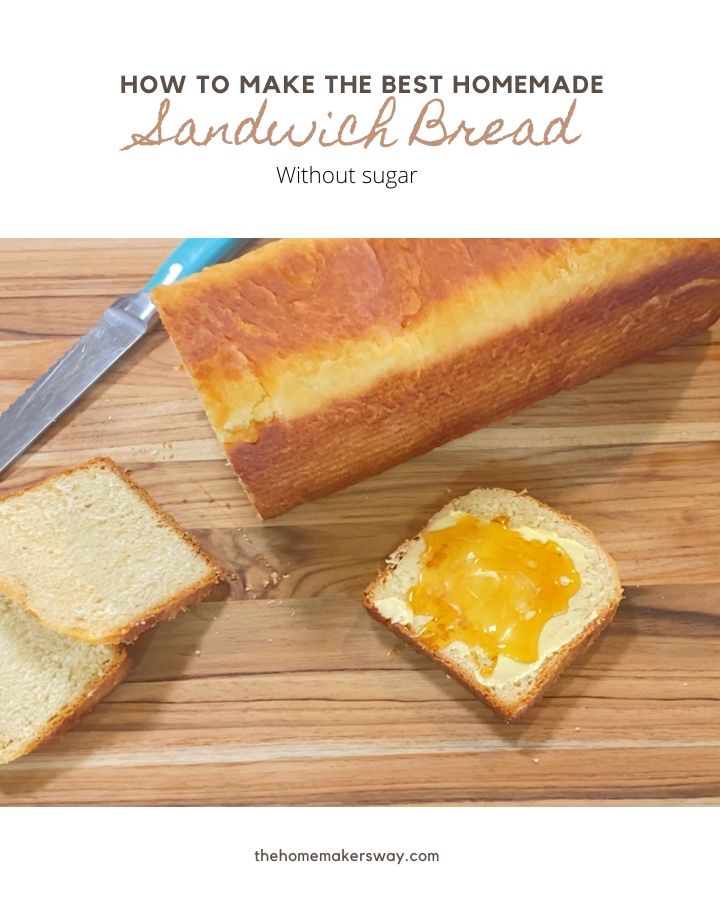
Soft and fluffy homemade sandwich bread is the perfect all purpose homemade loaf. Made with organic all purpose flour, raw milk, grass-fed butter, egg, and local raw honey to sweeten this is sure to be your go to weekly sandwich bread. Slice for soft sandwiches or smothered in butter and honey you can’t go wrong with this homemade bread!

This post contains affiliate links, which means I make a small commission at no extra cost to you. See my full disclosure here.
FAQ and Trouble Shooting
Does it matter what yeast I use?
I typically Don’t care what type of yeast I use, Just know rapid/instant yeast will rise a lot quicker than Active dry yeast.
Is it necessary to wait in your yeast to proof before going on?
I don’t bother waiting for my yeast to bloom or proof. If you know your yeast is good, then you can skip this step. If you are using those single packets of yeast, I would test it by proofing it before carrying on, as these packets aren’t always consistent.
How to Know when You used enough flour
Everyone’s dough will be different in size. There’s too many variables to know for sure how your dough will react. Things like types/brands of flour, the temperature, weather, time of year, the moister in the air all contribute to how your dough will react.
Go slow when adding flour, you don’t want to add all the flour at once, because of the reasons Above. Don’t be surprised if you only need 4 cups or if you need more like 9 cups of flour.
How much bread does this recipe make?
For the reasons above, I can’t give you an exact amount of bread you’ll be getting. With this recipe I usually get a 2 pound loaf and about 2-3 mini loafs. This day I could’ve got TWO, 2 pound pullman loafs, but I used the extra dough for dinner rolls instead.
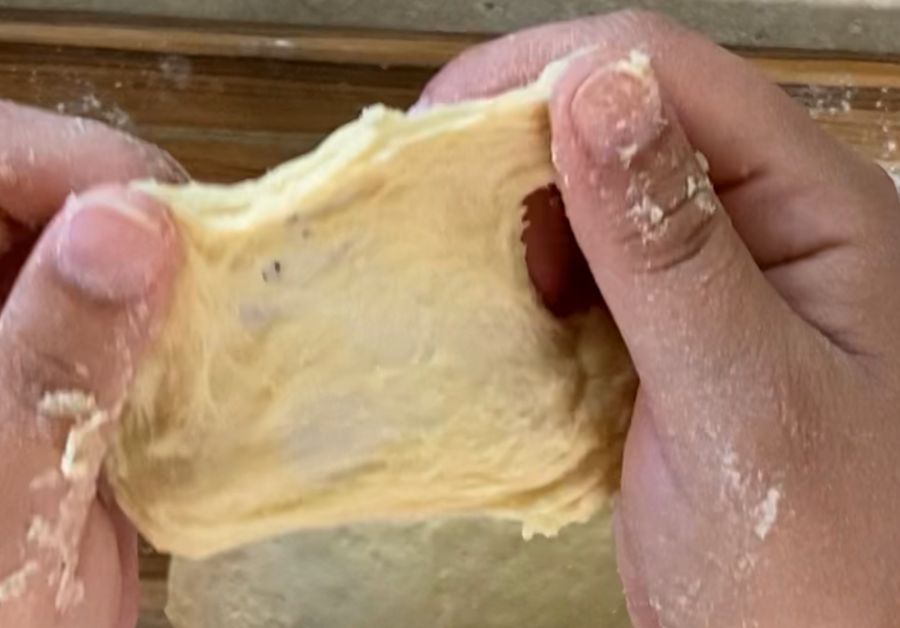
What is the Windowpane Test?
The windowpane test is when you get a small piece of dough and carefully stretch it with your fingers getting it as thin as you can without ripping. You want to be able to see light coming through it if you hold it up to a light. If it tears before you can see through it, you need to knead more.
What If My Dough Won’t Pass the Windowpane Test?
If you are having trouble getting your dough kneaded enough, let it rest for a few minutes (5-10) and then come back to it. The dough can and will naturally form gluten on its own. Test for the windowpane test again.
How Long Does It Take Dough To Rise?
Every ones dough will rise at a different pace regardless of the yeast you use. Again this is dependent on environmental factors Like how warm or cold it is in you house.
What Bread Pan Should I use?
You can use any loaf pan you’d like. I like USA pans And glass pans.
How Much Dough Do You Put in a Pullman Loaf Pan?
IF you are using a pullman loaf pan with the lid on it, be careful. Only fill the loaf pan about 1/3 of the way to allow for a second rise AND rising in the oven.
If you have never used a pull man, Try backing without the lid first. This will allow you to see how much dough you can actually put in it without it blowing off the top if you mad a mistake. Ask me how I know!
Ingredients for Homemade sandwich Bread
- 4 tbs unsalted butter + more for brushing
- 2 cups milk
- 1/2 cup honey
- 2 small eggs or 1 large egg beaten
- 1 tbs yeast
- 2 tsp salt
- 5-8 cups flour
How to Make Homemade Sandwich Bread
Heat butter, milk, and honey in a sauce pan just enough for the butter to melt and everything can combine.
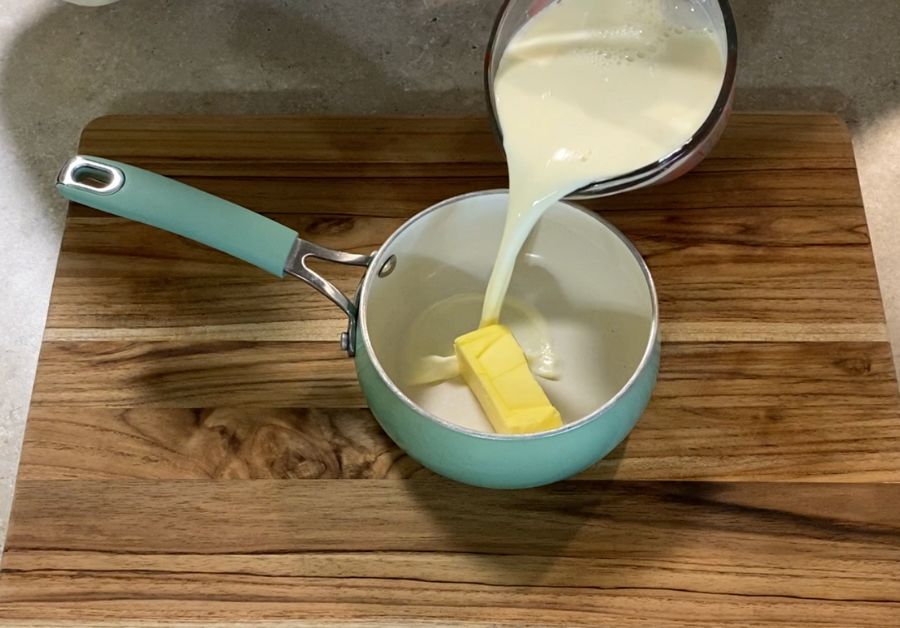
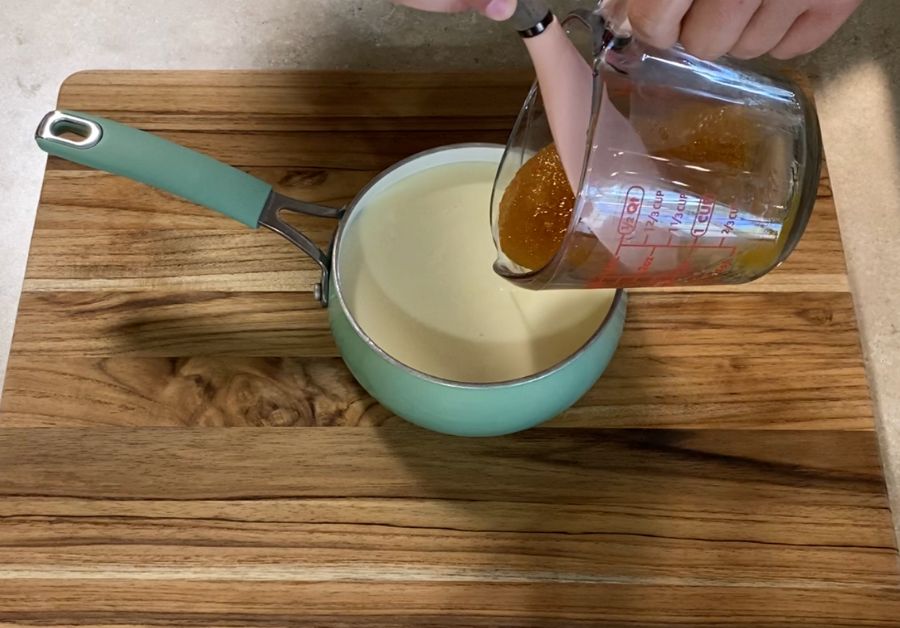
Take the pot off the heat.
Let the mixture sit until just warm (about 100°F). If you can’t stick your finger in the mixture and hold it without burning, then its too hot.
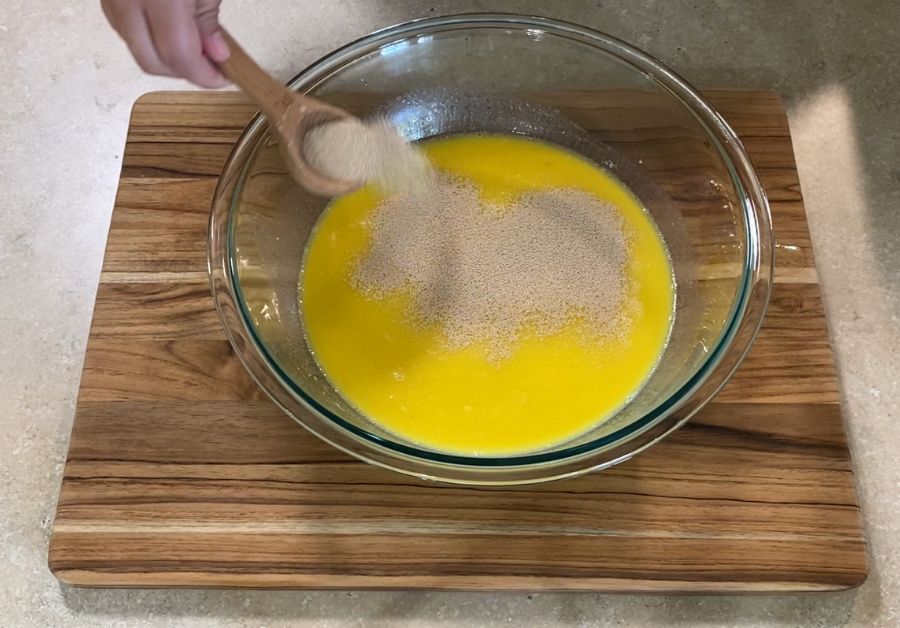
Beat the egg

Add the milk mixture and egg into a large bowl. Mix to combine.
Add in the salt and the yeast to the liquid ingredients and mix.*
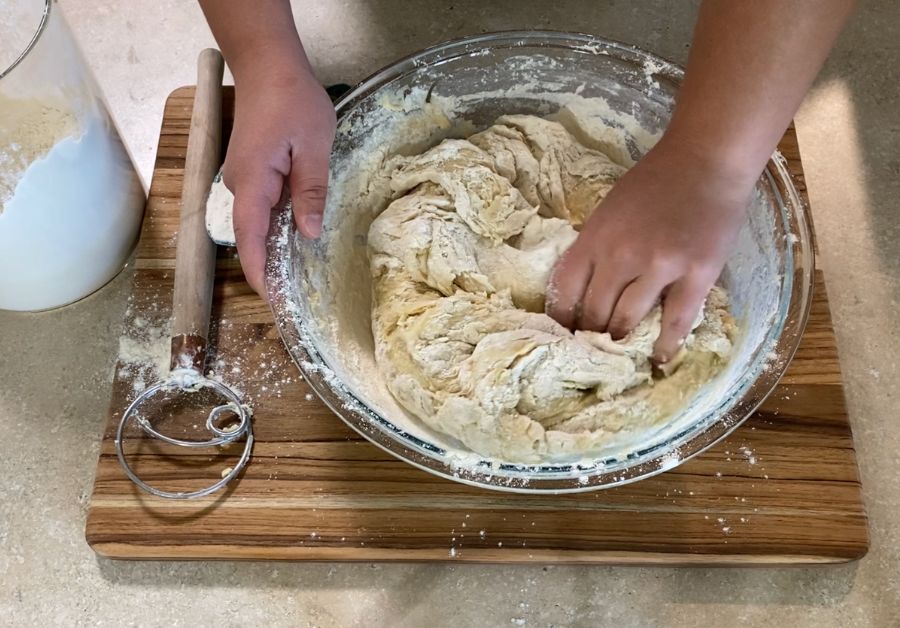
Slowly start adding flour, about ½ cup at a time.*Once the dough starts coming together, use your hands to mix.
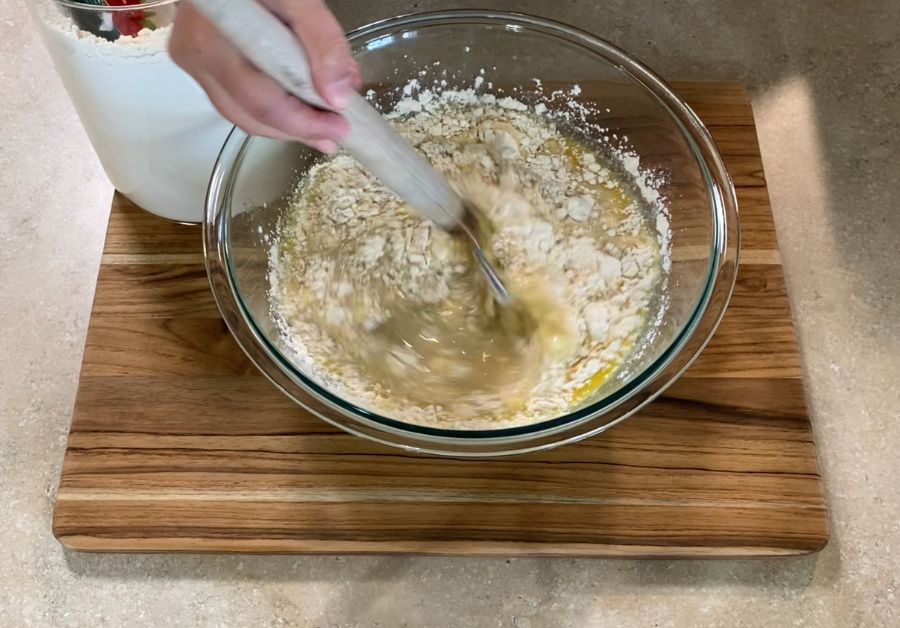
Once the dough comes away from the bowl, dump it onto a flat surface.
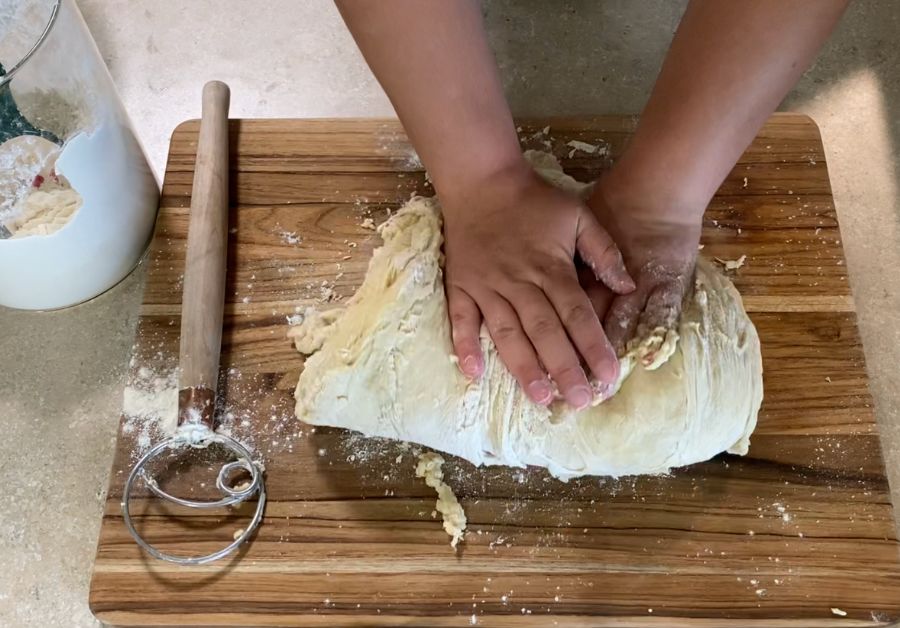
Kneed the dough until it passes the windowpane test. About 10-15 minutes.*

Once the dough can pass the test, split the dough into 2 oiled bowls or one really large bowl and cover.
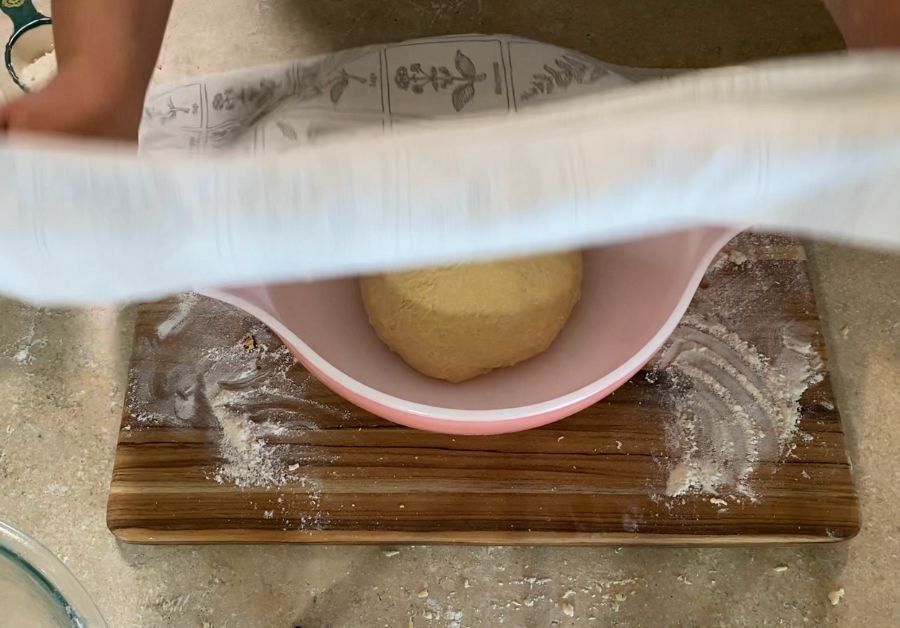
Let the dough rise to double in size.*
Once doubled, punch the dough down and slightly kneed it.
Split the dough how ever you’d like. I generally can make a 2 pound loaf and a few mini loafs with this one recipe.*
Shape your dough so it fits your loaf pan.
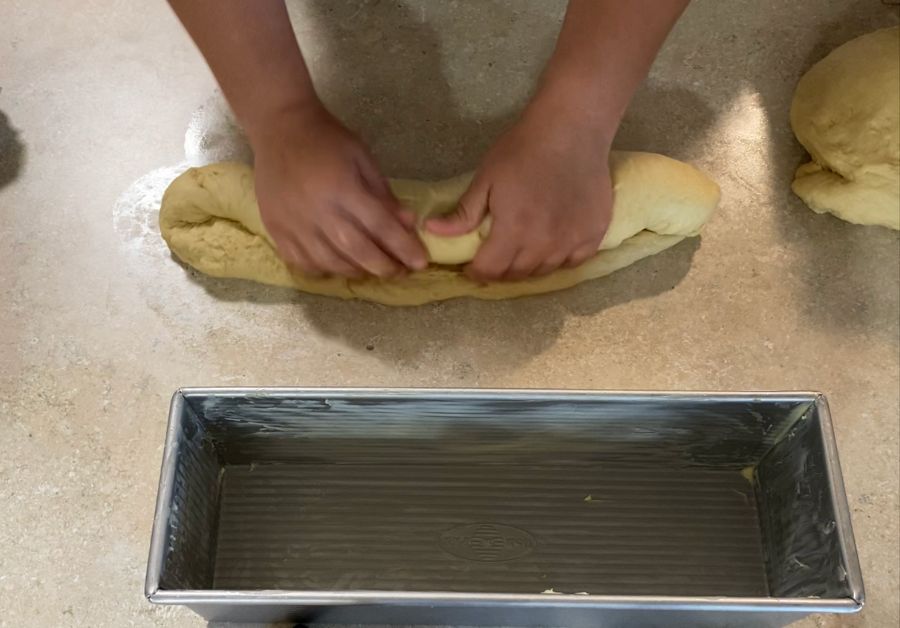
Slam or drop your shaped dough onto the counter so any air bubbles inside will be disrupted.
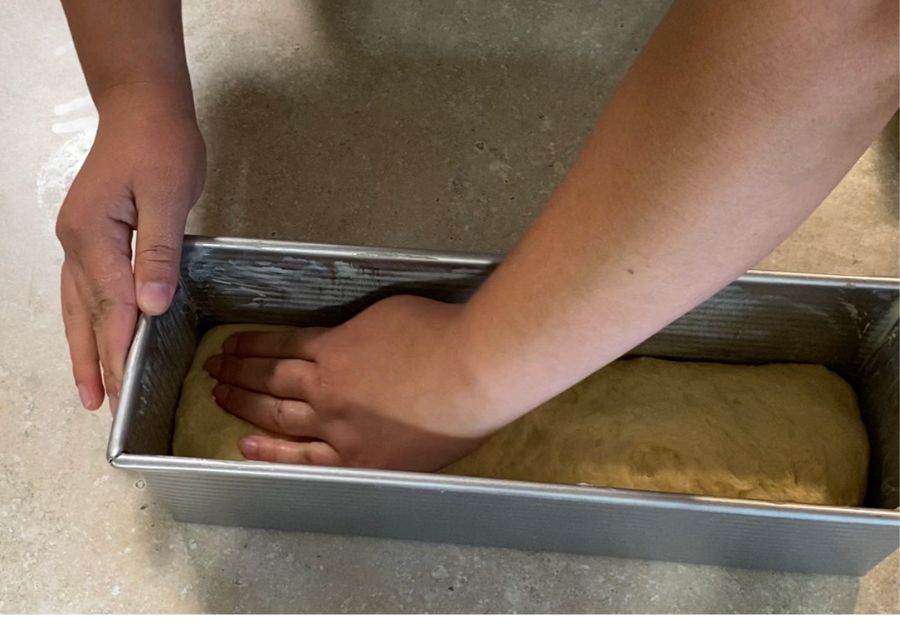
Place your shaped dough into a buttered loaf pan and cover to rise a second time.*
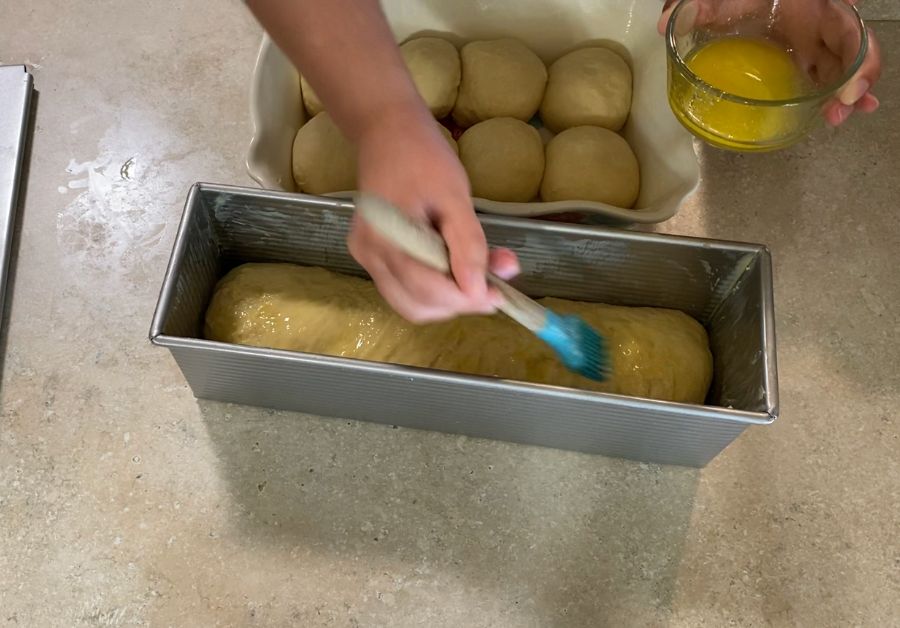
Brush the dough with melted butter.
Meanwhile, preheat the oven to 375°FOnce dough has risen, bake for 25-35 minutes for 1 pound loafs or 45-60minutes for larger 2 pound loafs ( keep an eye out).
After about 20-25 minutes check your loaf and rotate your pan. You’ll know when its done when you start smelling a nutty smell and the tops are golden.
Remove from the pan and do a flick test. If it sounds hallow, then it is for sure done.
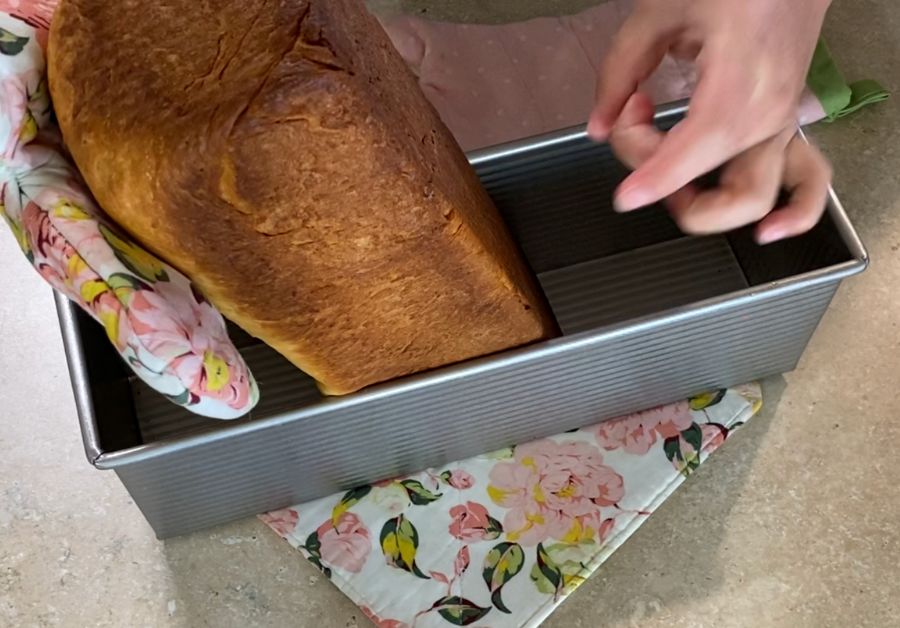
Brush more butter on the top of the freshly backed loaf so it will be soft.
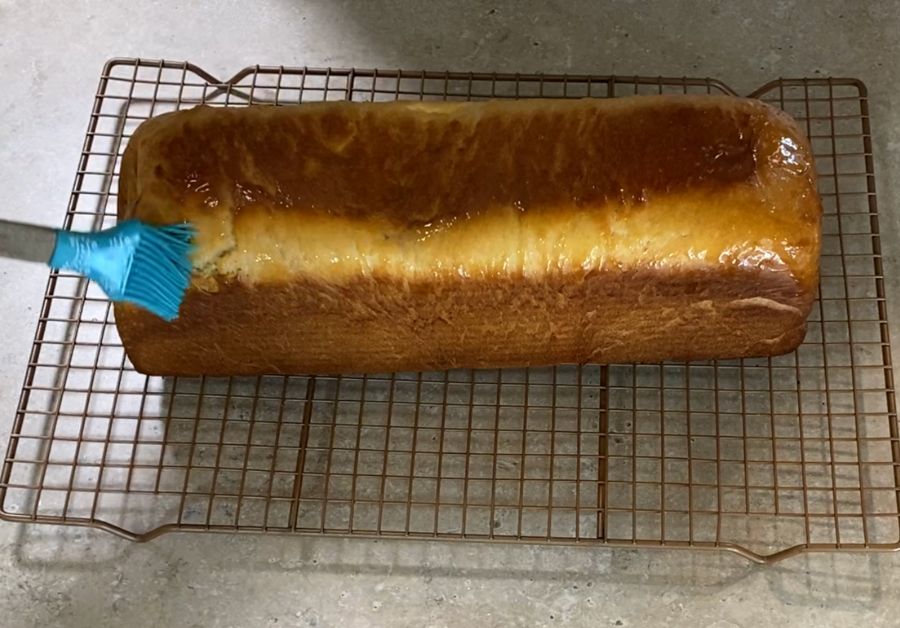
Let cool completely, on a cooling rack, before slicing.*
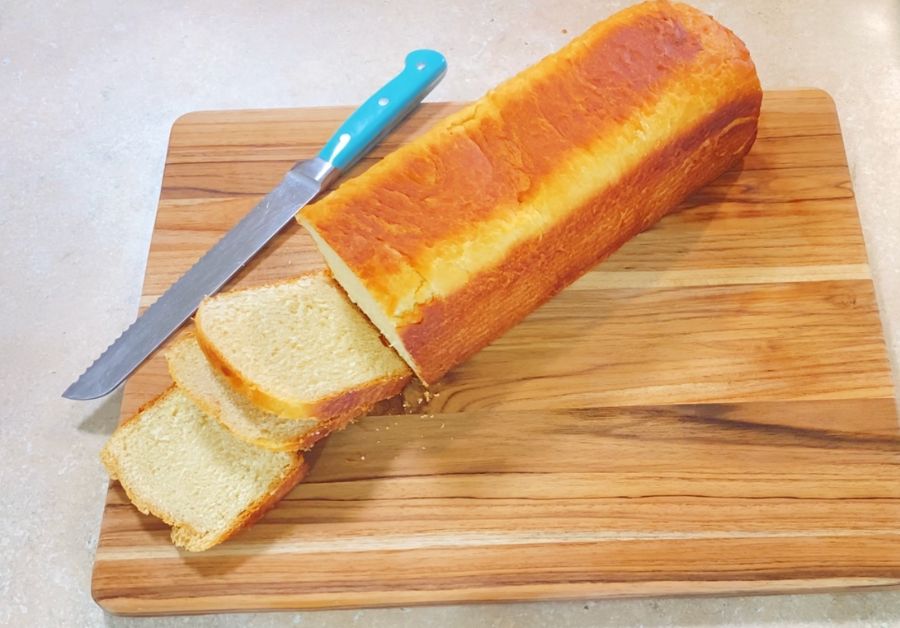
Slather a slice in butter and raw honey, or use it as soft sandwich bread!

Resources for homemade sandwich bread
- My pull man loaf pan
- A similar dough hook like mine
- Tips on how to make homemade bread better
- This bread is perfect for Waffle iron grilled cheeses
- Check out my 10 ESSENTIAL TOOLS NEW HOMEMAKERS NEED FOR A FROM SCRATCH KITCHEN
- Want to know how I afford healthy food on a very low budget check out this post!
Honey Butter Pullman Sandwich Loaf
Soft and fluffy homemade sandwich bread is the perfect all purpose homemade loaf. Made with organic all purpose flour, raw milk, grass-fed butter, egg, and local raw honey to sweeten this is sure to be your go to weekly sandwich bread. Slice for soft sandwiches or smothered in butter and honey you can't go wrong with this homemade bread!
Ingredients
- 4 tbs unsalted butter + more for brushing
- 2 cups milk
- 1/2 cup honey
- 2 small eggs or 1 large egg beaten
- 1 tbs yeast
- 2 tsp salt
- 5-8 cups flour
Instructions
- Heat butter, milk, and honey in a sauce pan just enough for the butter to melt and everything can combine.
- Take the pot off the heat.
- Let the mixture sit until just warm (about 100°F). If you can't stick your finger in the mixture and hold it without burning, then its too hot.
- Beat the egg
- Add the milk mixture and egg into a large bowl. Mix to combine.
- Add in the salt and the yeast to the liquid ingredients and mix.*
- Slowly start adding flour, about ½ cup at a time.*
- Once the dough starts coming together, use your hands to mix.
- Once the dough comes away from the bowl, dump it onto a flat surface.
- Kneed the dough until it passes the windowpane test. About 10-15 minutes.*
- Once the dough can pass the test, split the dough into 2 oiled bowls or one really large bowl and cover.
- Let the dough rise to double in size.*
- Once doubled, punch the dough down and slightly kneed it.
- Split the dough how ever you'd like. I generally can make a 2 pound loaf and a few mini loafs with this one recipe.*
- Shape your dough to fit your loaf pan.
- Slam or drop your shaped dough onto the counter so any air bubbles inside will be disrupted.
- Place your shaped dough into a buttered loaf pan and cover to rise a second time*
- Brush the dough with melted butter
- Mean while, preheat the oven to 375°F
- Once dough has risen, bake for 25-35 minutes for 1 pound loafs or 45-60minutes for larger 2 pound loafs ( keep an eye out).
- After about 20-25 minutes check your loaf and rotate your pan.
- You'll know when its done when you start smelling a nutty smell and the tops are golden.
- Remove from the pan and do a flick test. If it sounds hallow, then it is for sure done.
- Brush more butter on the top of the freshly backed loaf.
- Let cool completely, on a cooling rack, before slicing.*
- Slather a slice in butter and raw honey or use it for sandwiches!
Notes
- I typically Don't care what type of yeast I use, Just know rapid/instant yeast will rise a lot quicker than Active dry yeast.
- I don't bother waiting for my yeast to bloom. If you know your yeast is good, then you can skip this step. If you are using those single packets of yeast, I would bloom it before carrying on as these packets aren't always consistent.
- Everyone's dough will be different in size. There's too many variables to know for sure how your dough will react. Things like types/brands of flour, the temperature, weather, time of year, the moister in the air all contribute to how your dough will react.
- Go slow when adding flour, you don't want to add all the flour at once, because of the reasons Above. Don't be surprised if you only need 4 cups or if you need more like 9 cups of flour.
- For the reasons above, I cant give you an exact amount of bread you'll be getting. With this recipe I usually get a 2 pound loaf and about 2-3 mini loafs. This day I could've got TWO, 2 pound pullman loafs, but I Used the extra dough for dinner rolls.
- The windowpane test is when you get a small piece of dough and carefully stretch it with your fingers getting it as thin as you can without ripping. You want to be able to see light coming through it if you hold it up to a light. If it tears before you can see through it, you need to knead more.
- If you are having trouble getting your dough kneaded enough, let it rest for a few minutes (5-10) and then come back to it. The dough can and will naturally form gluten on its own. Test for the windowpane test again.
- Every ones dough will rise at a different pace regardless of the yeast you use. Again this is dependent on environmental factors Like how warm or cold it is in you house.
- You can use any loaf pan you'd like.
- IF you are using a pullman loaf pan with the lid on it, be careful. Only fill the loaf pan about 1/3 of the way to allow for a second rise AND rising in the oven.
- If you have never used a pull man, Try backing without the lid first. This will allow you to see how much dough you can actually put in it without it blowing off the top if you mad a mistake. Ask me how I know!
Leave a Reply